How to Operate a Press Brake: Step-by-Step Guide for Operators
- Conhecimento, Notícias
- 90+ reading now
Durmapress specializes in designing, manufacturing, and selling various metal processing equipment, including bending machines, shears, punches, and laser cutting machines. The company was founded in 2014, with years of experience and technology accumulation. DurmaPress has become one of the well-known brands in China's metal processing machinery industry.

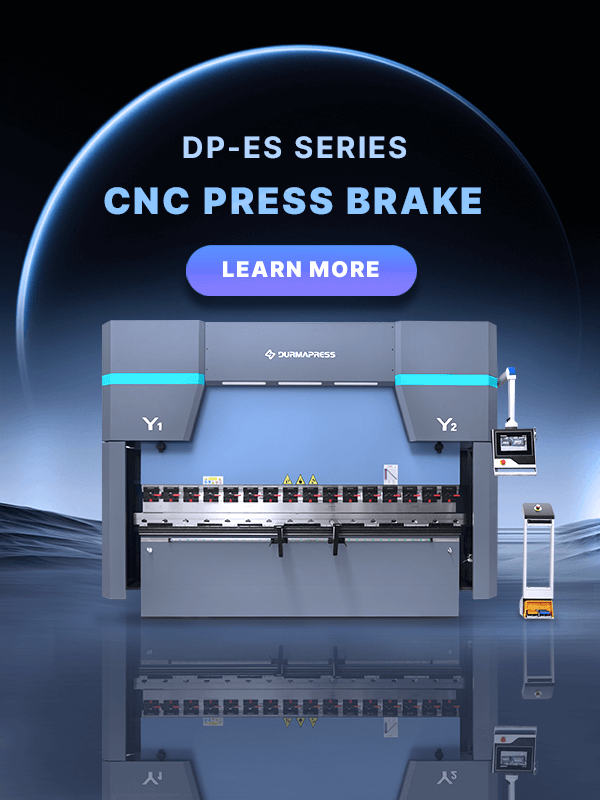
To operate a travão de prensa safely, select the correct punch and die, confirm the material thickness and V-die opening, set the back gauge, verify the bending parameters, perform a trial bend, compensate for springback, and then start production. CNC press brakes automate many settings, while manual press brakes require more direct adjustment by the operator.
Complete these checks before loading material, and continue to follow them throughout the bending cycle.
Press brake operation refers to the complete process of setting up the machine, selecting tooling, positioning the material, applying bending force, checking the angle, and producing parts safely and accurately.
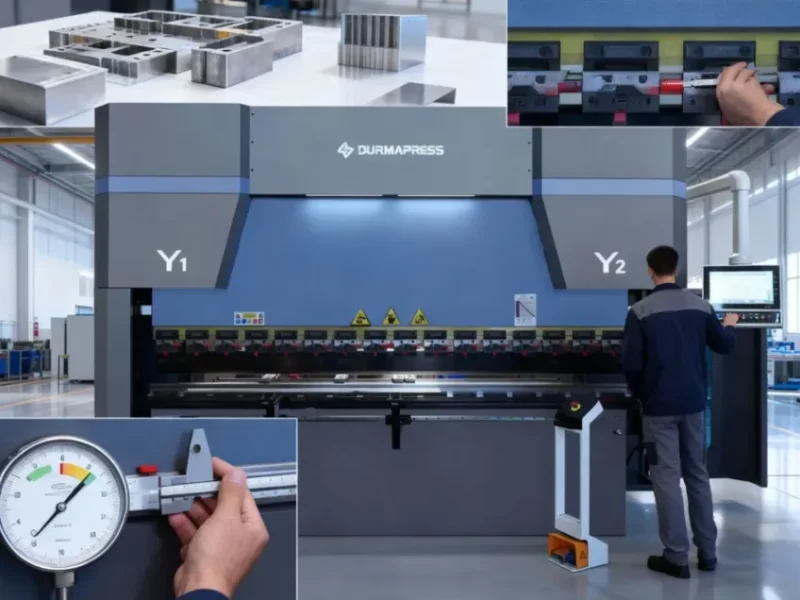
A press brake is a machine tool designed to bend sheet metal by clamping it between a punch (upper tool) and a die (lower tool). When the ram descends, the punch forces the sheet into the die cavity, causing the metal to deform plastically and hold the bent shape.
The basic principle hasn't changed in decades — what has changed is control precision. Early mechanical press brakes relied on a flywheel and clutch system, which gave limited control over stroke position. Modern prensa hidráulica e electric press brake machines use closed-loop servo systems that control ram position to within 0.01mm, which is what makes repeatable CNC bending possible.
Three things determine what angle you get out of a bend:
Understanding these three variables is the foundation of press brake operation. Everything else — tooling selection, tonnage calculation, springback compensation — connects back to them.
| Type | Drive System | Precisão | Tonnage Range | Best For |
|---|---|---|---|---|
| Hydraulic press brake | Oil cylinder | ±0.1mm | Up to 1000t+ | Thick plate, long bend length, heavy fabrication |
| Electric press brake | Servo motor | ±0.005mm | Up to 150t | Precision parts, high-mix low-volume, energy-sensitive shops |
| Prensa dobradeira CNC | Hydraulic or Electric + CNC | ±0.01mm | Varies | Automated multi-step bending, repeat production |
| Mechanical press brake | Flywheel + clutch | Limited | Low–medium | Basic bending, low-budget setups |
| Pneumatic press brake | Air pressure | Low | Low | Light sheet, simple profiles |
Complete this checklist before loading material or starting the first bending cycle.
| Check Item | What to Verify | Why It Matters |
|---|---|---|
| Machine condition | Check ram movement, hydraulic oil, controller status, and abnormal noise | Prevents machine failure during operation |
| Tooling | Make sure the punch and die are clean, aligned, and securely clamped | Avoids angle errors and tooling ejection |
| Material | Confirm thickness, grade, length, and grain direction | Affects tonnage, bend radius, and springback |
| Die opening | Select the correct V-opening based on material thickness | Controls bend radius and required bending force |
| Back gauge | Confirm the back gauge position matches the drawing | Prevents incorrect flange length |
| Safety devices | Test the light curtain, emergency stop, and guards | Protects the operator during bending |

The tooling combination determines the bend angle, bend radius, and whether the part comes out right on the first hit.
For most standard sheet metal bending, a straight punch paired with a V-die handles the majority of jobs. The key variable is V-die opening width — a common rule of thumb is 6–10× the material thickness. Thinner sheet (1–2mm) typically uses a narrower opening; heavier plate (6mm+) needs a wider die to keep tonnage requirements manageable.
If you're working on parts with deep flanges or return bends, a gooseneck punch lets you clear the workpiece without collision. Acute-angle punches come into play when the drawing calls for angles below 30°.
Before the first bend, you need to confirm the machine has enough force — but not so much that you're overloading the tooling or the frame.
A simplified field formula for air bending:
Tonnage (kN/m) = (Material Tensile Strength × Thickness²) / (V-die Opening)
Most Prensa dobradeira CNC machines have built-in tonnage calculators — enter the material type, thickness, and die opening and it calculates automatically. For manual machines, operators typically reference a tonnage chart posted at the machine.
Back gauge position sets where the sheet stops before each bend. On multi-bend parts, verify the back gauge steps match the sequence on the drawing — incorrect sequence is one of the most common causes of scrap on complex parts.
Air bending is the default for most shops — it's forgiving, requires less force, and lets you adjust the angle by changing stroke depth rather than swapping dies. The tradeoff is springback, which must be accounted for in the program.
Bottoming is worth the extra tonnage when you need consistent angles across a large batch. Coining is rarely justified outside of aerospace or precision enclosure work.
| Method | How It Works | Precisão | Tonnage | Best For |
|---|---|---|---|---|
| Air Bending | Sheet touches punch tip and die edges only | ±0.5–1° | Low | General fabrication, flexible angle adjustment |
| Bottoming | Sheet fully contacts die at bottom of stroke | ±0.25° | 3–5× air bending | Consistent angles on repeat production |
| Coining | Extreme force, material fully conforms to tooling | ±0.1° | 5–8× air bending | High-precision, low-volume work |
Step 1 — Inspect the Machine and Confirm the Setup
Before starting the bending process, inspect the press brake condition and confirm that the machine is ready for operation. Check the safety devices, verify that the correct punch and die are installed, and confirm that the material thickness, tooling selection, and bending parameters match the job requirements.A correct setup prevents incorrect bends, tooling damage, and unnecessary rework.
Step 2 — Set the Back Gauge and Position the Material
Set the back gauge position according to the bending drawing or CNC program before loading the workpiece.Then place the sheet metal against the back gauge fingers and ensure the material is aligned correctly. For long parts, use a support stand on the front side to prevent the sheet from sagging under its own weight, which can cause an uneven flange.
Step 3 — Load or Enter the CNC Programe
On a CNC press brake, load the correct bending program and verify the programmed parameters before starting the bending cycle. Check the bend sequence, bend angle, material thickness, tooling selection, and back gauge position on the controller screen. For manual press brakes, confirm the stroke depth and back gauge position through measurement rather than relying on memory.
Step 4 — Compare it with the drawing. Check
Never start production bending without a trial piece, especially on a new setup. Run one part, measure the angle with a protractor or angle gauge, and compare to the drawing.Check the bend angle, flange dimensions, and overall part accuracy against the drawing before moving to full production.
Step 5 — Check the Bend Angle and Dimensions
After the trial bend, measure the actual bend angle using an angle gauge or measuring tool.Compare the result with the required drawing specifications. If the angle, flange length, or bend position is incorrect, adjust the machine parameters before continuing production.
Step 6 — Compensate for springback
If the measured angle is 2° open (e.g., you got 92° when you needed 90°), adjust the stroke depth or apply the required angle correction in the CNC controller.Most CNC systems let you enter a springback offset directly. Don't skip this step — springback varies by material batch.
Step 7 — Start the Production Run Once the trial part passes inspection, begin the production run. During long runs, periodically re-check the bend angle because tooling wear and temperature changes can cause gradual variation.
| Item | CNC Press Brake Operation | Manual Press Brake Operation |
|---|---|---|
| Setup | Parameters are entered into the CNC controller | Stroke depth and back gauge are adjusted manually |
| Accuracy | Higher repeatability for multi-step bending | More dependent on operator experience |
| Back gauge | Automatically positioned by the program | Set manually or semi-automatically |
| Springback correction | Can be adjusted through the controller | Usually corrected through trial bends |
| Best for | Repeat production and complex parts | Simple bends and low-volume jobs |

Springback is the elastic recovery that occurs after the punch lifts and the material partially returns toward its original shape. It is one of the main reasons why a bent part may open from the target angle after forming.
Springback is affected by material type, thickness, bend radius, tensile strength, and bending method. Stainless steel and high-strength steel usually have more springback than mild steel, while aluminum varies depending on the alloy and temper.
For CNC press brake operation, springback can often be corrected by entering an angle correction or bend allowance adjustment in the controller. For manual press brake operation, the operator usually performs a trial bend, measures the angle, and slightly increases the stroke depth until the required angle is reached.
A practical rule is to always test springback using scrap material from the same batch. Even when the nominal thickness is the same, different material grades or suppliers can produce different springback behavior.
| Material | Springback Level | Operation Tip |
|---|---|---|
| Aço de baixo carbono | Low to medium | Usually corrected with slight overbending |
| Aço inoxidável | High | Requires more angle correction and accurate tooling |
| Alumínio | Medium | Use proper radius to avoid cracking or marking |
| High-strength steel | High | Check minimum bend radius and tonnage carefully |
Usually caused by machine deflection — the ram bends slightly in the middle under load, creating a convex bow in the part. The fix is coroamento: most prensa hidráulica machines have an automatic crowning system that adjusts the bed to compensate. If the machine has no auto-crowning, manual shim plates under the die can partially correct this.
The bend radius is too tight for the material. Increase the inner radius by switching to a punch with a larger tip radius or a wider die. For stainless and high-strength alloys, a minimum bend radius of 1–1.5× material thickness is a practical starting point — check the material spec sheet for the actual minimum.
Worn or dirty tooling, or a die with too sharp an edge radius. Clean the tooling surface first. If marks persist, polish the die shoulder radius or replace the tooling. For cosmetic parts, nylon or polyurethane die inserts prevent marks entirely.
Back gauge reference has shifted, or the tooling isn't fully seated in the clamp. Always re-run a trial bend when restarting a job after any tooling change — even if the program is unchanged.
Tonnage is calculated using: (Tensile Strength × Thickness²) / V-opening, or obtained directly from CNC press brake machine auto-calculation or tonnage charts.
Springback is material elastic recovery after bending; it is compensated by slight overbending, typically 1–3° for mild steel and 5–7° for stainless steel.
Air bending forms the angle without full die contact and needs less tonnage, while bottoming fully presses the material into the die for higher accuracy but requires more force.
Tooling should be checked at the start of each shift and immediately after any abnormal noise or visible wear.
Yes. Stainless steel needs higher tonnage and more springback control, while aluminum is softer but more prone to surface marking.
Good press brake operation starts before the machine moves — tooling selection, parameter setup, and a proper trial bend prevent the majority of scrap and rework. Once those fundamentals are in place, the machine does the rest.
For equipment selection, visit our prensa hidráulica e electric press brake product pages to compare specifications by tonnage and application. If you're unsure which machine suits your production requirements, contactar-nos directly — our engineering team can recommend the right configuration based on your material, thickness range, and bend length.
Preencha as informações abaixo para receber um orçamento gratuito e uma brochura do produto. Responderemos dentro de 24 horas!